Determining the appropriate server size is crucial, with a primary focus on RAM, given the resource-intensive nature of Ruby and Rails applications. Additionally, running databases like Postgresql or MySQL, along with Redis for background workers, adds to the RAM requirements. For initial deployments, I suggest opting for a 2GB RAM server ($10/mo). While a 1GB server might be feasible, there's a likelihood of running into RAM constraints, especially during asset compilation in production deployment.
Initiate the server creation process by navigating to DigitalOcean and accessing the "Create Droplet" page.
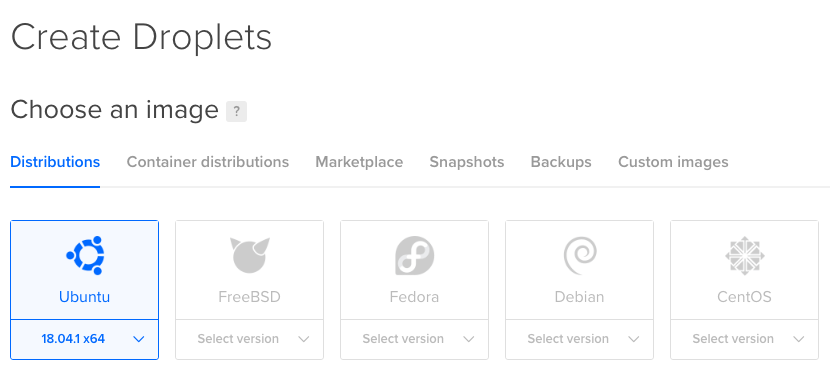
Step 1: Select your operating system
Opt for Ubuntu 22.04 as the preferred operating system for your server. This version is a long-term support (LTS) release, ensuring extended security updates, a critical factor for production environments.
In the "Choose an image" section, pick Ubuntu 22.04 from the dropdown menu.
Step 2: Choose your size Proceed to choose the server size based on your comfort level.
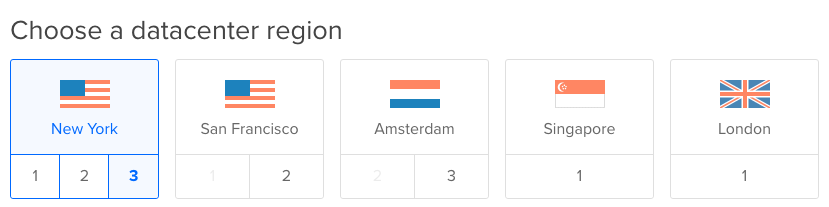
If uncertain, opt for a 2GB RAM server initially. The flexibility of virtual servers allows seamless resizing to a larger capacity later, without any data loss. This characteristic of "virtual" servers enables the addition of more RAM or CPUs at any point, providing convenient scalability. Step 3: Select your region.
In this step, pick the server region, which determines the data centre location for your server. Opt for a region that is in close proximity to your users or yourself, ensuring optimal performance. Step 4: Optional settings.
If desired, you can enable the following options:
Private Networking: This is beneficial if you intend to have a distinct database server or if you need to communicate with other servers in the datacenter.
IPv6: Enable this option to assign an IPv6 address to your server. It's a good practice, though not mandatory.
Monitoring: Activate this option to receive basic metrics on server usage. It provides useful insights into server performance.
Backups: This feature creates backups of your entire server as an image, allowing for restoration. While these backups may not occur frequently, they offer a safety net. Alternatively, you can skip these if you prioritize more frequent hourly database backups.
Step 5: Create your server.
Click on "Create" to initiate the server creation process. DigitalOcean will take approximately 60 seconds to set up your server. After completion, check your email for the password associated with the new server.
To log in as root, use the following command, replacing `1.2.3.4` with your server's public IP address:
ssh root@1.2.3.4
Step 6: Creating a Deploy user.
While logged in as `root` on the server, execute the following commands to establish the deploy user and include them in the sudo group, limiting permissions in production to mitigate the risk of potential full server control in the event of a security breach:
You can now log in as either `root` or `deploy` without entering a password!
For the remainder of this tutorial, it's recommended to be logged in as deploy to set up everything. Let's SSH in as deploy now, and you shouldn't be prompted for a password this time.
ssh deploy@1.2.3.4
Installing Ruby We're about to install Ruby using a Ruby version manager, which is beneficial not only in development but also in production for quick Ruby version upgrades.
Begin by installing dependencies required for Ruby compilation and some Rails dependencies. To ensure Webpacker support in Rails, we'll first add the Node.js and Yarn repositories to our system before installing them.
Additionally, we'll install Redis to enable ActionCable for websockets in production. You may also consider configuring Redis as your production store for caching.
Ensure you're logged in as the deploy user on the server and execute the following commands:
We can now begin installing Ruby since we have dependencies installed.
Choose the version of Ruby you want to install: Moving forward, our next step is to install Ruby using a Ruby version manager called rbenv. It stands out as the easiest and simplest option, complemented by convenient plugins for straightforward management of environment variables in a production environment.
deploy$ # This installs the latest Bundler, currently 2.x.
deploy$ gem install bundler
deploy$ # For older apps that require Bundler 1.x, you can install it as well.
deploy$ gem install bundler -v 1.17.3
deploy$ # Test and make sure bundler is installed correctly, you should see a version number.
deploy$ bundle -v
deploy$ # Bundler version 2.0
If you encounter a message saying "bundle not found," execute the command rbenv rehash and then attempt the operation again.
Installing NGINX & Passenger
In our production environment, NGINX will serve as the web server for handling incoming HTTP requests. Subsequently, these requests will be directed to Passenger, responsible for running our Ruby application.
The installation process for Passenger is relatively uncomplicated. We will include their repository, followed by the installation and configuration of their packages.
deploy$ sudo apt-key adv --keyserver hkp://keyserver.ubuntu.com:80 --recv-keys 561F9B9CAC40B2F7
deploy$ sudo sh -c 'echo deb https://oss-binaries.phusionpassenger.com/apt/passenger $(lsb_release -cs) main > /etc/apt/sources.list.d/passenger.list'
deploy$ sudo apt-get update
deploy$ sudo apt-get install -y nginx-extras libnginx-mod-http-passenger
deploy$ if [ ! -f /etc/nginx/modules-enabled/50-mod-http-passenger.conf ]; then sudo ln -s /usr/share/nginx/modules-available/mod-http-passenger.load /etc/nginx/modules-enabled/50-mod-http-passenger.conf ; fi
deploy$ sudo ls /etc/nginx/conf.d/mod-http-passenger.conf
With NGINX and Passenger successfully installed, the next step involves directing Passenger to the correct Ruby version.
To initiate this process, open the Passenger config file using your preferred text editor, whether it's nano or vim.
deploy$ # If you want to use the Nano for editing
deploy$ sudo nano /etc/nginx/conf.d/mod-http-passenger.conf
deploy$ # If you want to use the Vim for editing
deploy$ sudo vim /etc/nginx/conf.d/mod-http-passenger.conf
We simply want to change the `passenger_ruby` line to match the following:
passenger_ruby /home/deploy/.rbenv/shims/ruby;
Save this file and we'll start NGINX.
$deploy$ sudo service nginx start
To verify whether NGINX is running, visit your server's public IP address in your browser. If NGINX is operational, you should see the "Welcome to NGINX" message.
Moving on, our next task is to replace this default NGINX server configuration with one tailored for our application.
$deploy$ sudo rm /etc/nginx/sites-enabled/default
$deploy$ # If you want to use the Nano for editing
$deploy$ sudo nano /etc/nginx/sites-enabled/myapp
$deploy$ # If you want to use the Vim for editing
$deploy$ sudo vim /etc/nginx/sites-enabled/myapp
We want the contents of our NGINX site to look like the following.
Change `myapp` to the name of your app. We'll use this same folder later on when we define our Capistrano deploy_to folder.
Save the file and then we'll reload NGINX to load the new server files.
deploy$ sudo service nginx reload
Creating a PostgreSQL Database To set up a PostgreSQL database, we'll begin by installing the PostgreSQL server and `libpq`, enabling the compilation of the pg rubygem.
Next, we'll switch to the `postgres` Linux user, which possesses full database access. We'll use this account to establish a new database user for our applications, naming it `deploy`.
Finally, the last command will create a database named `myapp`, with the deploy user designated as the owner. Be sure to replace `myapp` with the actual name of your application.
You can manually connect to your database anytime by running psql -U deploy -W -h 127.0.0.1 -d myapp. Make sure to use 127.0.0.1 when connecting to the database instead of localhost.
Creating a MySQL Database
For MySQL, we'll install both the server and client libraries so we can compile the mysql2 rubygem.
deploy$ sudo apt-get install mysql-server mysql-client libmysqlclient-dev
deploy$ sudo mysql_secure_installation
deploy$ # Open the MySQL CLI to create the user and database
deploy$ mysql -u root -p
Now that we're within the MySQL command line interface, we can create a database for our app and a dedicated user with restricted access to this database. Establishing an app-specific user enhances security in the event of a compromise.
It might seem like we're creating two users because MySQL treats users over localhost differently than users over an IP address. This setup allows for both scenarios.
In the provided example, remember to replace the following names:
Replace `myapp` with the actual name of your database, typically reflecting your app's name. Replace `$omeFancyPassword123` with your chosen password. If you prefer a different name, replace `deploy` with your desired database user name.
mysql> CREATE DATABASE IF NOT EXISTS myapp;
mysql> CREATE USER IF NOT EXISTS 'deploy'@'localhost' IDENTIFIED BY '$omeFancyPassword123';
mysql> CREATE USER IF NOT EXISTS 'deploy'@'%' IDENTIFIED BY '$omeFancyPassword123';
mysql> GRANT ALL PRIVILEGES ON myapp.* TO 'deploy'@'localhost';
mysql> GRANT ALL PRIVILEGES ON myapp.* TO 'deploy'@'%';
mysql> FLUSH PRIVILEGES;
mysql> \q
Setting Up Capistrano
Back on our local machine, we can install Capistrano in our Rails app. We'll need to add the following gems to our Gemfile:
We need to edit the Capfile and add the following lines:
require 'capistrano/rails'
require 'capistrano/passenger'
require 'capistrano/rbenv'

set :rbenv_type, :user
set :rbenv_ruby, '3.3.0'
Then we can modify `config/deploy.rb` to define our application and git repo details.
set :application, "myapp"
set :repo_url, "git@github.com:username/myapp.git"

# Deploy to the user's home directory
set :deploy_to, "/home/deploy/#{fetch :application}"

append :linked_dirs, 'log', 'tmp/pids', 'tmp/cache', 'tmp/sockets', 'vendor/bundle', '.bundle', 'public/system', 'public/uploads'

# Only keep the last 5 releases to save disk space
set :keep_releases, 5

# Optionally, you can symlink your database.yml and/or secrets.yml file from the shared directory during deploy
# This is useful if you don't want to use ENV variables
# append :linked_files, 'config/database.yml', 'config/secrets.yml'
Now we need to modify config/deploy/production.rb to point to our server's IP address for production deployments. Make sure to replace `1.2.3.4` with your server's public IP.
server '1.2.3.4', user: 'deploy', roles: %w{app db web}
Before we can deploy our app to production, we need to SSH into the server one last time and add our environment variables.
Add any environment variables you need for production to this file.
# For Postgres
DATABASE_URL=postgresql://deploy:PASSWORD@127.0.0.1/myapp

# For MySQL
DATABASE_URL=mysql2://deploy:$omeFancyPassword123@localhost/myapp

RAILS_MASTER_KEY=ohai
SECRET_KEY_BASE=1234567890

STRIPE_PUBLIC_KEY=x
STRIPE_PRIVATE_KEY=y
# etc...
Save this file and these environment variables will be automatically loaded every time you run Ruby commands inside your app's directory on the server.
Using this method, we can have separate env variables for every application we deploy to this server.
Now we can deploy our app to production:
cap production deploy
Open your server's IP in your browser and you should be greeted with your Rails application.